iStudio Publisher icon

Rapid Start Guide

iStudio Publisher is a page layout application for creating documents from text, images and graphics.

If you already understand the basics of desktop publishing (DTP) and prefer to discover how an application works for yourself, this page will give you the essentials and takes only a few minutes to read.

Shapes Hold All Document Content

Whenever you add a new piece of content to your document, it becomes embedded in a shape that you can select and work with.

Each shape is a graphical container to which you can add any combination of:

text in columns

text along its outline path

an image

a corner style

a line stroke style

a color fill or gradient fill

a drop shadow

a text runaround

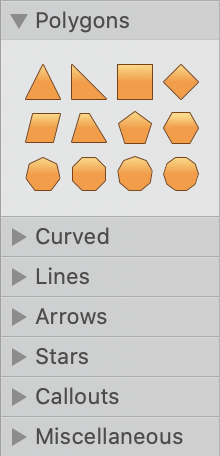
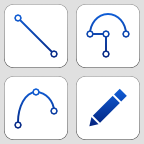
There are several ways to create shapes:

use the Text Box Tool to draw a rectangle with no line or fill

Text Box Tool

select and draw standard shapes from the Shape Library

Shape Library palette title bars

construct your own shapes using the drawing tools in the Toolkit

Toolkit line drawing tool icons

Type, paste or drag text into shapes you have drawn; and insert, paste or drag an image into these shapes.

You can also insert an image, or drag new content (text and/or images), into your document without first drawing or selecting any shapes. In this case, default shapes (rectangles) are automatically created to hold the new content.

Shapes provide fully adjustable "shaped cropping" of images. You can size and position an image with complete freedom behind the "viewing window" formed by the image's containing shape. Only the image area that lies within the shape is visible.

Any shape can be given a text runaround with any outset distance, which causes text to flow around it, rather than over or under it.

Use the Inspectors to add, remove and edit text, images and styles to a shape as well as editing the shape itself for complete control over your document.

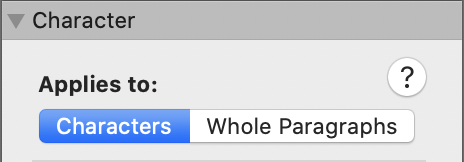
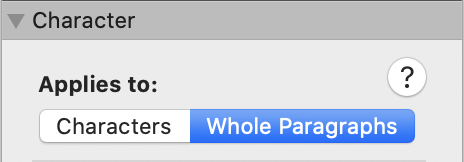
The opacity of each element of a shape (text, text shadow, image, line, fill, and shadow) can be set separately, on the corresponding inspectors. Also, an overall opacity can be set on the Shape Inspector, which applies to all elements on a shape, and combines with any other opacity settings. For example, if some text has been set to 50% opacity on the Character Inspector and its containing shape is set to 60% opacity the two opacity settings will combine to give the text an opacity of 30%.

Documents, Pages and Views

You can open multiple documents at the same time. Each document is displayed in its own document window.

Choose menu option Window > New Document Window (or keyboard shortcut  ⇧⌘N  Shift-Command-N) to open an additional window on the current document.

Each document window holds an independent view of a document. Edits that you make in one document window are displayed in all other views of the same document, in real time.

Each document window has its own independent settings for:

Showing (or hiding) the Tab Bar

Page Mode (Master Pages or Body Pages)

Edit Mode (Normal View, Text View or Preview)

Snap to Grid (on/off)

Snap to Margins (on/off)

Grid

Margins and Bleed

Shape Outlines

Columns and Gutters

Runarounds (for text wrapping)

Invisible Flow Items

Baselines

Glyph Bounding Boxes

Mouse Cross-hair

Hyperlinks

Zoom

Page or spread selection

Toolkit & Shape Library (show/hide)

Info Bar (show/hide)

Rulers (show/hide)

Toolbar (hide/show)

Enter full screen

Use the Page Mode buttons (on the page view title bar) to select between Body Page View and Master Page View. The button blue fill color indicates the current selection.

Page Mode buttons

A new document window opens up in Body Page View.

Use the Edit Mode buttons (on the page view title bar) to select between Normal View, Text View and Preview.

Edit Mode buttons

Normal View is the normal design mode. By default, Normal View shows all document content and large images are shown at reduced quality. Different options for image and PDF display quality are provided on the View Options window. Normal View can include different sorts of non-printing construction lines and characters, to aid with document creation, which can be shown (or hidden) via settings on the View menu.

Text View helps focus on writing, by removing distractions. All images and PDFs are substituted by placeholders and all shape shadow and text shadow is hidden. Shapes and lines can either be displayed at reduced opacity, or hidden entirely, via the View Options window. Text View can include all the same non-printing construction lines and characters as Normal View, which are shown (or hidden) via the same settings on the View menu.

In Preview, what you see on the screen is exactly what will be printed or exported as a PDF. All non-printing construction lines and characters are hidden and the View menu settings for these items are ignored. All images and PDFs are shown at original (full) resolution, which is how they are included in all printouts and PDF exports.

As more large images and PDFs are added to a document it may start to respond more slowly to editing actions. Similarly, adding many shape and text shadows can also make a document less responsive. If this occurs, these corrective options are available:

Speed Boost (Image & PDF). This View menu option applies application wide and switches on/off image and PDF handling optimisations.

In Normal View, the View Options window (opened via menu option View > View Options..., or keyboard shortcut  ⌘J  Command-J) provides options for image and PDF display quality and whether shape shadow and text shadow is shown (or hidden).

The gray rectangle behind each page or two page spread is called the canvas.

Canvas and page

You can create content anywhere on a canvas. The canvas provides a useful working area when you don't want to interfere with an existing page layout.

When you print your document, only content within the page boundaries is printed (unless you select to add bleed and crop marks, which will be added outside the page boundaries, effectively increasing the print size by the combined size of the bleed and crop marks on each page edge - see below for more information about bleed and crop marks).

Fast Zooming and Panning

To zoom smoothly, in or out of a document, hold down the Option key (marked 'alt' on some keyboards) and use your mouse scroll wheel. The zoom is centered on the mouse location.

To pan smoothly around a document, i.e. move your field of view in any direction, use Option-drag.

To zoom to the current shape selection (in or out), use Option-double click.

Text Containers

There are two types of text container: columns and paths.

To create a container with a text column:

Rectangular text box:

Use the Text Box Tool Text Box Tool to draw a rectangle with no line or fill; or

Command-drag with any of the Pointer Tool, Text Tool, Reshaping Tool or Rotation Tool selected.

Shaped text container:

Command-drag with a Shape Library tool selected.

To enter column text inside an existing shape, double click on it with any of the Pointer Tool, Text Tool, Reshaping Tool or Rotation Tool selected. A column will be created if one doesn't exist already and the text cursor is inserted.

To enter text on a shape's path, you must first enable the path by either:

enabling it manually using the Text Along Path Tool, which is required for individual paths that are not flow linked; or

enabling it automatically using the Text Flow Tool to flow link the path to any other text container (column or path).

To use the Text Along Path Tool for manual path enabling, move your mouse cursor over a shape's outline until the outline becomes highlighted blue and the message "Click to Type on Path" is displayed, then click to enable the path for text entry.

More information about using the Text Flow Tool is provided in the Flow linking section (see below).

Once any particular path has been enabled, that path can be opened for edit at any time by simply double clicking on it with any of the Pointer Tool, Text Tool, Reshaping Tool or Rotation Tool selected.

Selecting Text

There are two selection modes for text:

character selection mode (blue selection)

Character selection shown in blue

paragraph selection mode (purple selection)

Paragraph selection shown in purple

Enter character selection mode by:

clicking and dragging across text; or

double clicking to select a word (and dragging if required); or

clicking the Characters selector on the Character Inspector, as shown.

Characters selector on the Character Inspector

Enter paragraph selection mode by:

triple clicking on a paragraph (and dragging if required); or

quadruple clicking on a paragraph (to Select All in Flow); or

Choose All in Flow, either from the Edit > Select Text menu, or by using Command-A; or

clicking the Whole Paragraphs button on the Character Inspector, as shown.

Whole Paragraphs button on the Character Inspector

Applying Character Format Settings

The format or style of every character is controlled at two levels, both of which you can adjust:

Firstly, paragraph level character settings apply to all of the characters throughout a whole paragraph. Each character forms part of a paragraph and each paragraph has its own set of paragraph level character settings that define the default format for all of the characters within the paragraph.

Secondly, individual character settings can be applied to individual characters. Applying individual character settings is optional, but if applied these will always override and take precedence over the corresponding paragraph level character settings.

Here's an example of how this works in practice. Imagine this paragraph forms part of an iStudio Publisher document. It has a paragraph level character setting of no underline. To underline just these characters their individual character setting has been set to underline.

IMPORTANT: When the Return key is pressed the paragraph level character settings carry forwards to the next paragraph and any individual character settings will not influence the text formatting of the next paragraph. Similarly, if existing text is selected and overtyped it will revert to its paragraph level character settings, and any individual character setting overrides will be removed.

You can apply text format settings to whole paragraphs or individual characters, depending on whether you select text in paragraph selection mode or character selection mode.

Flow Linking

Text can flow through any combination of linked columns and paths. Flow links can be set up using the Text Flow Tool.

Text Flow Tool

Here's a micro movie that demonstrates the following four flow link activities:

1. Flow linking a column to another column.

2. Deleting that flow link.

3. Flow linking a column to a path.

4. Flow linking that path to its own column.

NOTE: The text that appears in the movie as the containers are flow linked is overflow text from the first container.

Text flow icons indicate the existence of flow links and text overflows, for columns and paths, as follows:

Text outflow icon  text outflow

Text inflow icon  text inflow

Text overflow icon  text overflow

To display text flow icons select one or more text container(s) with the Pointer Tool.

The following example shows the text flows present after completing flow link step 1. of the above micro movie.

Text outflow, inflow and overflow icons

It shows a text outflow from the hexagon's column (orange icon) and the corresponding text inflow into the curved shape's column (green icon). The curved shape is also showing a text overflow (red icon), warning that some of the text in the flow has not been displayed because it won’t fit into the column space available.

When flow linking a source (upstream) text container to a target (downstream) container, any existing text in the target container will be appended to any existing text in the source container. No text content is lost or deleted.

When flow linking a source (upstream) text container to a target (downstream) text flow that spans multiple text containers, here's what happens when flow linking to the second or subsequent text container in this target text flow:

No existing text in the target flow will be appended to the source container.

No text content is lost or deleted - all existing text in the target flow is retained, and continues to flow from the first text container in this text flow. It's useful to think of all text in a flow as always belonging to whichever container holds the start (also referred to as the head) of the flow.

If you have a text flow that spans several linked text containers here's what happens if you select some but not all of the containers with the Pointer Tool and delete them:

No text content is lost or deleted - the existing flow is rejoined automatically to bridge across each of the deleted containers.

If a shape containing the head of a text flow is being deleted, the head is moved to the first available downstream container not being deleted.

Printing and Exporting

Printing and exporting menu options are available on the File Menu. Printing uses the standard macOS Print dialog. There are separate menu options available for exporting to: PDF file as single pages, PDF file as two page spreads, booklet PDF file, EPUB or RTF file.

Bleed and Crop Marks

When designing a document with images that extend to the page edges, it is common practice to add bleed and crop marks. Bleed and crop marks can be enabled and set up on the Document Inspector, and get added when you export to PDF file by choosing menu option File > Export as PDF (or to booklet PDF via menu option File > Export as Booklet PDF). Note that bleed and crop marks don’t get added if you print via iStudio Publisher's File > Print menu option.

Bleeds are added outside the finished page size, and are shown as red lines in the document window. You should extend your page content beyond the finished page size, and out as far as the red bleed lines. Crop marks are added outside the bleeds. Crop marks aren't shown in the document window, and only get added when you export to PDF or booklet PDF.

Shortcuts

To speed up your work, we recommend that you become familiar with the mouse actions and keyboard shortcuts.

If you are still unsure about how to get started, more extended help information is available at the following link:

Related Topics

About iStudio Publisher

The Toolkit

About the Shape Library

The Inspectors