iStudio Publisher icon

About Viewing Documents

You can open multiple views of the same document by opening more document windows (menu option Window > New Document Window, or keyboard shortcut  ⇧⌘N  Shift-Command-N).

Each document window holds an independent view of a document and has its own independent view settings, which can be set on the page view title bar and View menu. Edits that you make in one document window are displayed in all other views of the same document, in real time.

There is also a View Options window, providing options that apply application wide (to all document windows).

View Settings on the Page View Title Bar

Use the Page Mode buttons to select between Body Page View and Master Page View. The button blue fill color indicates the current selection.

Page Mode buttons

A new document window opens up in Body Page View.

Use the Edit Mode buttons to select between Normal View, Text View and Preview.

Edit Mode buttons

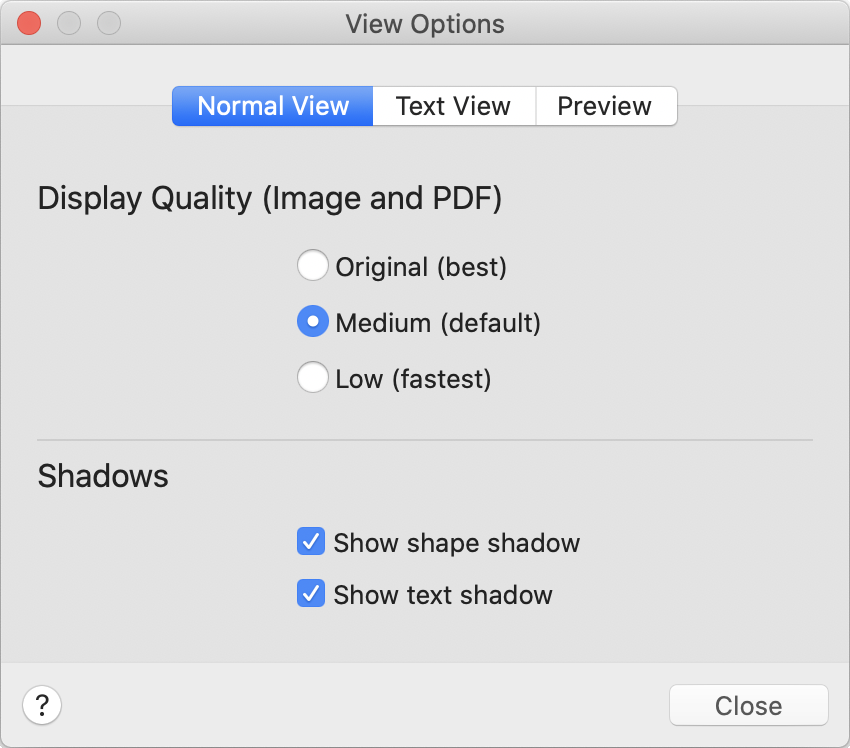
Normal View is the normal design mode. By default, Normal View shows all document content, although shape shadow and text shadow can optionally be hidden via options on the View Options window (more about this below). By default, large images are shown at reduced quality and different options for image and PDF display quality are provided on the View Options window. Normal View can include different sorts of non-printing construction lines and characters, to aid with document creation, which can be shown (or hidden) via settings on the View menu.

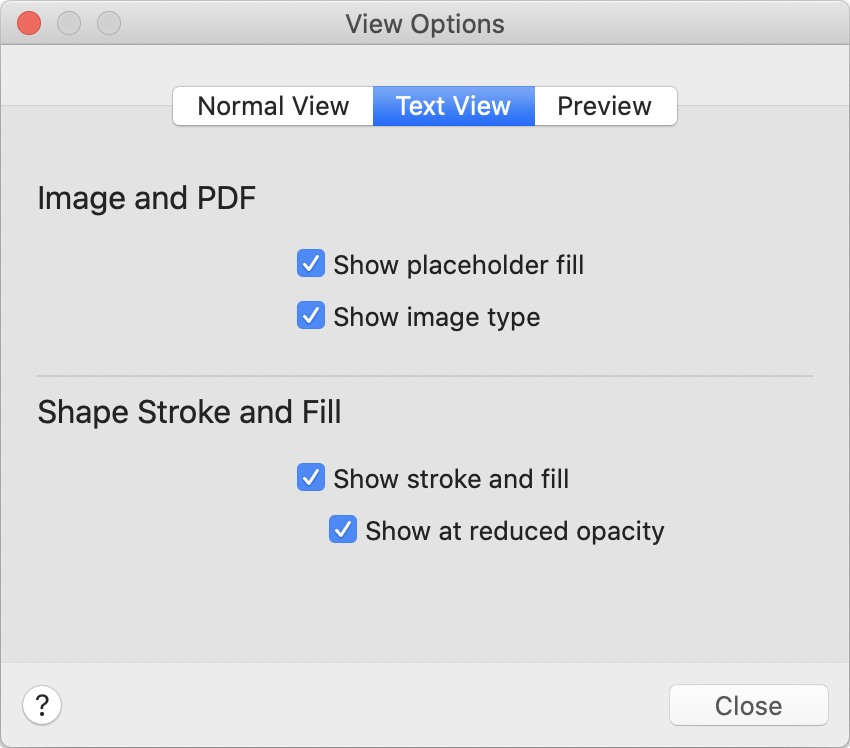
Text View helps focus on writing, by removing distractions. All images and PDFs are substituted by placeholders and all shape shadow and text shadow is hidden. Shapes and lines can either be displayed at reduced opacity, or hidden entirely, via the View Options window. Text View can include all the same non-printing construction lines and characters as Normal View, which are shown (or hidden) via the same settings on the View menu.

In Preview, what you see on the screen is exactly what will be printed or exported as a PDF. All non-printing construction lines and characters are hidden and the View menu settings for these items are ignored. All images and PDFs are shown at original (full) resolution, which is how they are included in all printouts and PDF exports.

View Settings on the View Menu

Each document window has its own independent settings for:

Showing (or hiding) the Tab Bar

Page Mode (Master Pages or Body Pages)

Edit Mode (Normal View, Text View or Preview)

Snap to Grid (on/off)

Snap to Margins (on/off)

Grid

Margins and Bleed

Shape Outlines

Columns and Gutters

Runarounds (for text wrapping)

Invisible Flow Items

Baselines

Glyph Bounding Boxes

Mouse Cross-hair

Hyperlinks

Zoom

Page or spread selection

Toolkit & Shape Library (show/hide)

Info Bar (show/hide)

Rulers (show/hide)

Toolbar (hide/show)

Enter full screen

Speed Boost (Image & PDF). This View menu option applies application wide and switches on/off image and PDF handling optimisations.

It provides a significant speed boost in all activities requiring dynamic image/PDF refresh, including: image sizing and positioning; image container sizing, positioning and node editing; document scrolling, zooming and panning; document window resizing; selection of window arrangements; and show/hide of the Toolkit, Info Bar and rulers.

A side effect of this option is that images and PDFs are shown blurred while dynamic changes are underway.

View Settings on the View Options Window

To open the View Options window choose menu option View > View Options... (or keyboard shortcut  ⌘J  Command-J).

Settings on the View Options window are applied to all document windows.

View Options are specific to either Normal View or Text View.

View Options window for Normal View

The View Options window for Normal View is shown in the adjacent screenshot.

Normal View > Display Quality (Image and PDF) enables adjustment of the image and PDF display quality/speed balance.

Original (best) displays images at full quality, which is the same as Preview. With this option set, documents may start to respond more slowly as many large images and/or PDFs are inserted.

Medium (default) is the default setting and is recommended for most situations. At Medium (default) quality, all images with width and height under 1000 pixels are displayed at original quality. Larger images, with dimensions above these threshold values, are displayed at reduced resolution.

Low (fastest) should be selected for documents containing many large images and PDFs, or when iStudio Publisher's view refresh becomes overly slow. At Low (fastest) quality, all images with width and height under 200 pixels are displayed at original quality. Larger images, with dimensions above these threshold values, are displayed at reduced resolution.

iStudio Publisher auto-generates in-memory copies of all the reduced resolution images it requires.

Normal View > Shadows enables hiding of shape shadow and/or text shadow, as documents containing many shadows can start to feel less responsive. The defaults are for both types of shadow to be shown.

View Options window for Text View

The View Options window for Text View is shown in the adjacent screenshot.

Text View > Image and PDF provides options for what's shown instead of images and PDFs.

Text View > Shape Stroke and Fill provides options for either hiding shapes and lines entirely, or showing them at reduced opacity (which is the default option).

The View Options window for Preview contains no options, just information about Preview.

Related Topics

Opening Multiple Document Windows

Zooming and Panning