To size/fit an image inside its shape:
Having inserted an image into a shape, and adjusted the Use DPI setting, you are now ready to adjust image size and fit. Image size is determined by how the image is set to fit in its containing shape and (for some Fit options) the size of the containing shape.
How an image fits in its containing shape is controlled by the options available in the Fit pop-up list. Images are added to shapes with a default Fit setting of “Fit - No Stretch”, which makes the image resizable.
How to apply the fit settings is decribed below in terms of four main outcomes you can achieve: full size, resized, resized and cropped, and tiled:
Full size: Choose Fit: Original Size to fix the image size at full size for the selected Use DPI setting. The Fit controls for manual sizing are disabled.
Resized: If you want to change the image display size and require all, or most, of the image to be visible, the easiest approach is to choose one of the following three Fit options. Each of these options scales the image to fit entirely within the bounding box of its containing shape, and enables image repositioning/resizing by selecting and moving/resizing the containing shape.
Fit - No Stretch, scales an image proportionally, such that it always just fits within (and fills) the smallest relative dimension (width or height), and fits within the largest relative dimension with space around.
Fill - No Stretch, scales an image proportionally, such that it always just fits within (and fills) the largest relative dimension (width or height), and crops the image in the smallest relative dimension.
Stretch to Fill, scales an image disproportionally (changing it's aspect ratio), such that it always just fits within (and fills) both dimensions (width and height).
All three of these Fit options disable the Fit controls for manual sizing.
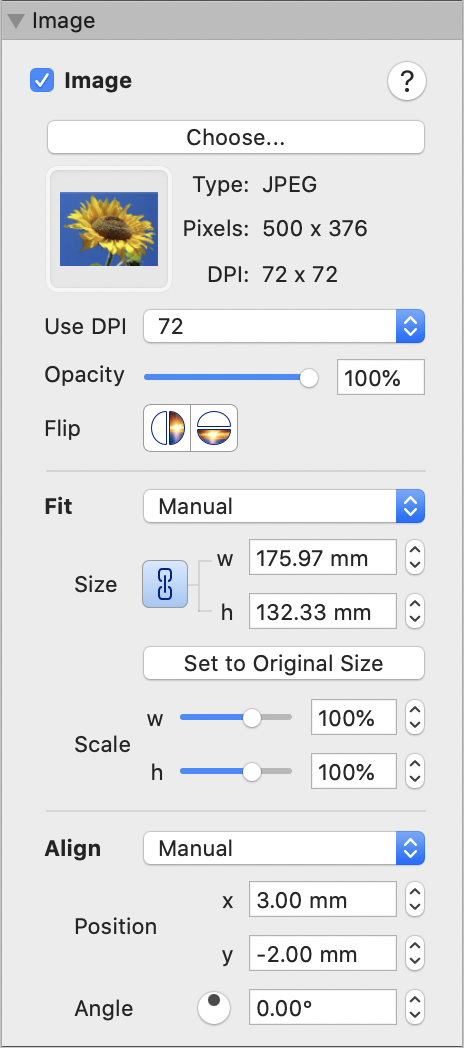
Resized and cropped: Choose Fit: Manual if you want to change the image size and crop an image so that only part of it remains visible. All of the manual sizing controls are enabled (as shown in the above image).
IMPORTANT: Avoid setting Fit: Manual and then scaling down an image so that its containing shape remains much larger than the image. This can become inconvenient if the containing shape covers other document content and prevents its selection. We recommend only setting Fit: Manual when you want to crop an image.
The manual sizing controls have a default setting of proportional scaling for the image width and height. To apply disproportional image scaling (change the aspect ratio), you must deselect the proportional scaling lock by clicking the blue chain icon (next to the Size label).
TIP: After adjusting the aspect ratio, you can reapply the proportional scaling lock to maintain the new aspect ratio during any further resizing.
Tiled: Choose Fit: Tile to create a tile pattern made up of multiple copies of an image that fills it's containing shape. The tiling effect may not be visible until you make the image size smaller than its containing shape. One copy of the image behaves as a "seed image"; you apply all image settings to the seed image and all the surrounding image copies change to match. All of the same Fit settings as for Fit: Manual are available for adjusting the seed image. If you switch to and fro between Fit: Manual and Fit: Tile you will see that the only difference between them is the extra image copies that get added in Tile mode.
As an alternative to the Image Inspector, you can use the Image Tool to size images graphically, using your mouse.