Show/Hide Inspectors icon

Document Inspector

Use the Document Inspector to set:

Page size and orientation, including standard and non-standard page sizes.

Page margin sizes.

Bleed and crop marks.

Snap grid size and grid line spacing.

Document title and author meta data fields, for inclusion in an EPUB export file.

To change the page size and orientation:

Click the Page button, or choose File > Page Setup, to open the standard macOS Page Setup dialog.

NOTE: The Page button is labelled with the current page size.

Set up the page size and orientation. You can select a standard page size, or select/create a named custom size.

To set the page margins:

the Document Inspector, Margins tab selected

Select the Margins tab (as shown).

If your document is comprised of a series of single pages, you will offered Left and Right settings (as shown), whereas for documents set up for spread editing these will be replaced by Inside and Outside settings.

Set the size of the four page margins using the clicker controls or by inputting new values directly.

Remove any page margin from view by setting it to zero.

To add bleed and crop marks:

the Document Inspector, Bleed tab selected

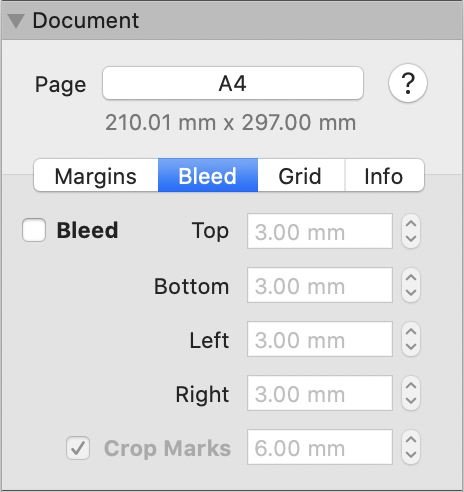
Select the Bleed tab (as shown).

The default is for bleed and crop marks to be off (as shown). To enable bleed and crop marks select the Bleed checkbox.

Set the size of the four bleeds using the clicker controls or by inputting new values directly. Default values for the bleeds are 1/8" or 3mm, which is recommended by many printers. The bleeds increase the page size and are shown as red lines in the document window.

NOTE: If your document is comprised of a series of single pages, you will offered Left and Right settings (as shown), whereas for documents set up for spread editing these will be replaced by Inside and Outside settings, as per the page margins.

Enabling bleed will also add crop marks, on a crop marks slug of the specified size, which is added to each of the four page sides outside the bleed. Crop marks aren't shown in the document window, and are exported to PDF file with a Generic CMYK color profile and component values of C: 50%, M: 50%, Y: 50%, K: 100%. Crop marks can be removed by deselecting the Crop Marks checkbox.

Export your document to PDF file, by choosing menu option File > Export as PDF. Alternatively, export your document as a booklet PDF, by choosing menu option File > Export as Booklet PDF.

NOTE 1: You can't print a document with bleed and crop marks directly - you need to export it to PDF file or booklet PDF first, and then print the PDF file as a second step. To export to PDF file choose menu option File > Export as PDF. To export to a PDF file that can be printed and assembled as a booklet choose menu option File > Export as Booklet PDF.

NOTE 2: When exporting as a booklet PDF any bleed set along the fold line side of a page will be ignored and omitted.

More about Bleed and Crop Marks

More about Printing and Exporting

To set the snap grid:

the Document Inspector, Grid tab selected

Select the Grid tab (as shown).

Set the horizontal and vertical grid spacings using the clicker controls or by inputting new values directly.

You can choose to show only some of the grid lines, for example, set Show Lines Every 2 to show every second grid line, Show Lines Every 3 to show every third grid line, etc., which is particularly useful with small grid spacings.

NOTE: The grid anchor (origin) will be settable in a future version, but in the current version this control is disabled and the grid origin is at the page bottom left.

To set the document title and author meta data fields:

the Document Inspector, Info tab selected

Select the Info tab (as shown).

Type or paste in the Title and Author fields.

These fields are provided for entering the corresponding meta data to an EPUB export file.

Related Topics

About Measurement Units

The Inspectors